Contents
A wedding celebration is an event that everyone is looking forward to: the newlyweds themselves, their relatives and friends. Close relatives of the newlyweds, as a rule, spend a lot of time choosing a gift, a festive bouquet and a card, where they write wishes to the newlyweds. Not a single congratulation can do without the last little thing, and therefore invited people are sure to go to her specialized stores to look for her. An alternative to this is the manufacture of an original postcard with your own hands. Let's figure out how to make a birthday card yourself.
How to make a beautiful DIY wedding card?
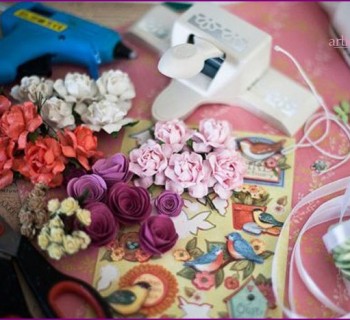
If you decide to make a greeting card for the newlyweds with your own hands, there is no doubt that it will be treasured by the newlyweds, because such gifts are much more valuable than those bought. As its basis, use thick paper or cardboard, decorate using a variety of techniques - scrapbooking, quilling. Decorate a wedding card with rhinestones, beads, ribbons, lace, dry or artificial flowers, drawings, patterns. The workshops below will help you create an original product that will appeal to the heroes of the occasion..
Quilling greeting card
Quilling or «paper rolling» - This is a technique used in many areas of needlework. Wizards create greeting cards by folding and twisting narrow strips of paper. More of them make photo frames, albums, jewelry, paintings. Thanks to a large selection of paper in different colors and weights, you can easily find materials that are ideal for decorating wedding cards.
Necessary materials
- A sheet of thick white paper (or another light shade).
- Sheets of thin paper needed for curling «rolls». You can use special quilling sets, which include the source material, already cut into thin strips. In this case, the process of making cards will go much faster.
- Coloring paper for scrapbooking with patterns or patterns..
- Satin ribbons.
- Halved beads.
- Pencil.
- Scissors.
- Ruler.
- Stationery or other knife.
- Tool for paper rolling. Toothpicks, matches, empty ballpoint pens can replace this part..
Stages of creation
- From a dense white sheet, cut a rectangle measuring 20 by 15 centimeters. Fold in half. This will be the basis of the future postcard..
- Cut the scrapbooking paper. It should turn out a rectangle measuring 9.5 by 14.5 centimeters.
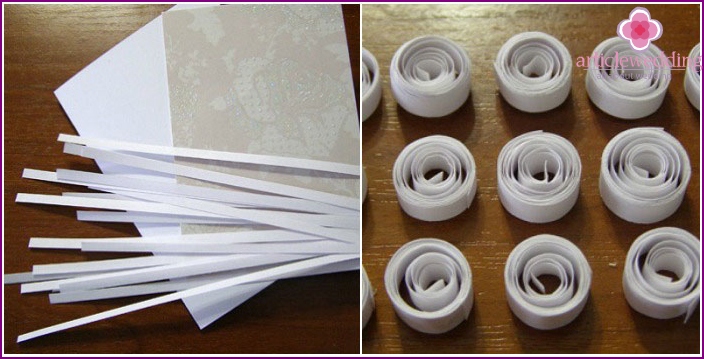
- Cut the quilling material into equal strips - for a postcard you will need about fourteen to sixteen pieces.
- Take a quilling tool or its alternative, start curling paper. One end must be fixed with glue. Make sure that the strips are twisted tightly, do not fall apart. When «roll» will be ready, fix the free edge with glue so that the finished element does not unwind.

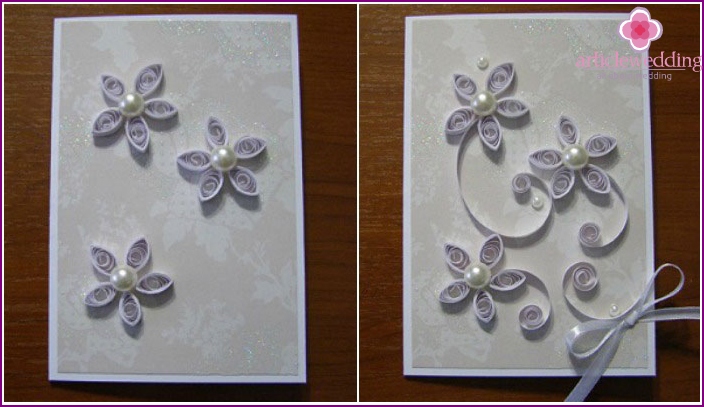
- Glue a rectangle of scrap paper to the base of the future postcard. Make sure that this element is exactly in the middle, try on it several times before fixing. Take the resulting round rolls, flatten them on both sides so that the edge paper forms an acute angle - the petals are ready. With their help, form flowers (one will need 5 petals), fix on the front side of the card. Finish the tender plant by gluing a half of a radiant bead to the core.
- Decorate the touching composition additionally with spirals of untwisted rolls, decorate as you wish - with rhinestones, beads, sparkles. In the lower right corner, fasten the satin bow, which will be the final element of the decor. Wedding Greeting Card Ready!
Scrapbooking Happy Birthday Wedding Card
Greeting cards made using scrapbooking technique are cute, airy and touching. Such cards can be minimalistic, using only two or three colors and a small amount of decorative elements. It is extremely important for scrapbooking - to correctly combine the shades, patterns and drawings on scrap paper so that the finished product does not turn out to be too messy. The harmonious selection of details of such a card guarantees its magnificent appearance..
Necessary materials
- Thick paper or a sheet of cardboard (A4 format).
- Two sheets of scrapbooking paper matching in color.
- Stationery knife.
- Scissors (curly for edges).
- Ruler.
- Double sided tape.
- Glue.
- Lace.
- White satin ribbon.
- Decorative «a bunch», which must first be made independently or purchased in a specialized store.
- A small printout with the inscription «Happy wedding!»
- Halves of pearl beads.
Stages of creation
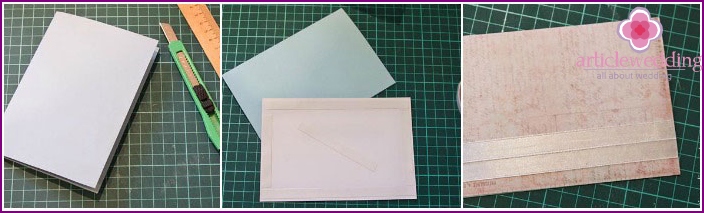
- Create the basis for the postcard with a stationery knife and a ruler - bend the A4 sheet in half, carefully cut off the excess to get a blank of 10 by 15 centimeters.
- For the background, take a sheet of scrap paper, similarly cut off the edges with a clerical knife to get the basis for the future decor, 10 by 15 centimeters in size. Cover the workpiece with double-sided tape, attach scrap paper on top.
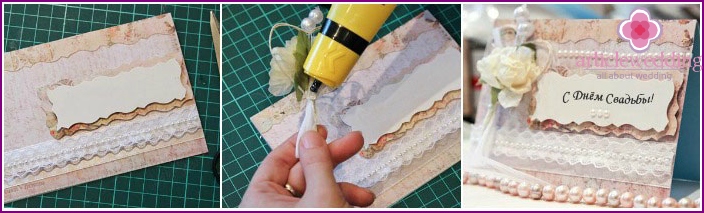
- Visually identify the horizontal center of the future postcard and just below the double-sided tape. Place two thin satin ribbons (or one wide) on top of it, carefully cut off the protruding parts of the material, treat the edges of the ribbons with a lighter so that they do not «crumbled».
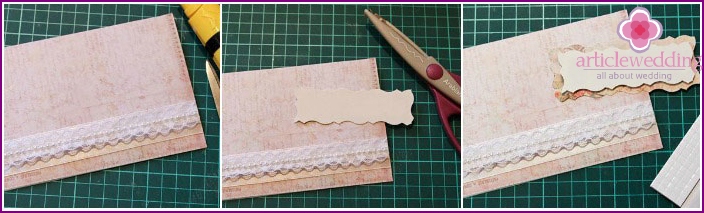
- Apply a little glue just above the tapes (do not use double-sided tape for lace fabric), fix the decorative lace there. Wait for the glue to dry, then cut the edges with scissors. Decorate the fabric with halves of pearl beads.
- Cut thick paper or a piece of cardboard, as shown in the photo. It will be needed for the inscription.
- Cut a small sheet of colored scrap paper, a little more than the blank for the inscription. The shape of the edges should be identical to the edges of the workpiece. Connect the two elements with double-sided tape, and for larger use adhesive pads.
- On the upper border of the postcard, on a double-sided tape, attach scrap paper that is different in color from the background. Make the shape of the edges the same as for blanks for inscription. Place the blanks themselves immediately above the lace, on the right side of the card.
- Take the finished decorative bouquet, which will become the main decoration of the card. Place the element so that the inscription remains visible, and the bouquet itself does not protrude beyond the edges of the product. Fix the decoration of the greeting card with glue.
- When the glue has completely dried, complete the decor with elegant halves of pearls. Beautiful wedding card is ready!
Postcard in the form of an envelope for money.
A great gift for newly made spouses is money. Newlyweds have enough expenses at the beginning of family life. On the shelves of souvenir shops there are many options for cash wedding envelopes, but it is even better to make such a thing with your own hands. In addition to the gift amount, guests can put a congratulatory card there. Consider how to make a wedding envelope using scrap paper, satin ribbons and other beautiful decorative elements..
Necessary materials
- Double-sided scrapbooking paper with a suitable pattern.
- Scoring tool.
- Mat, cutter.
- Satin ribbon (organza ribbon is suitable).
- Curb hole punch (clerical knife).
- Glue.
- Double sided tape.
- Jewelry.
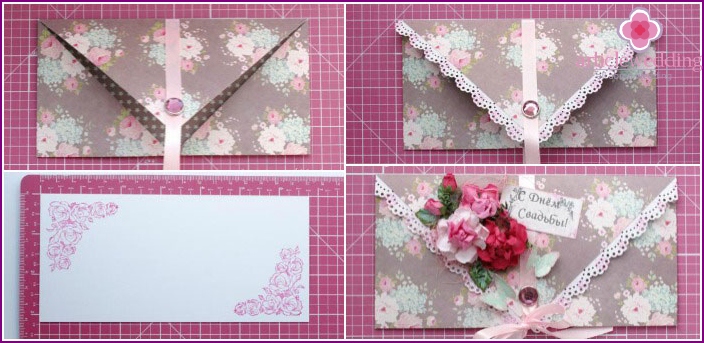
Stages of creation
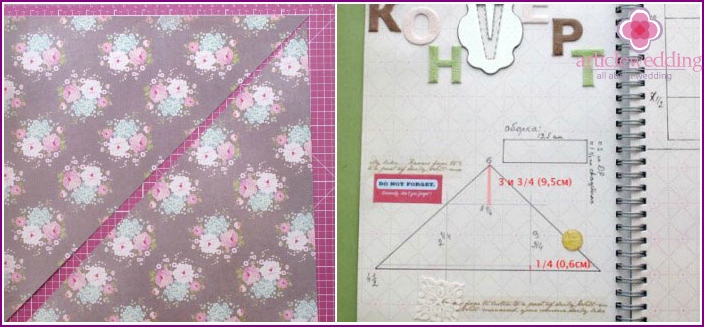
- On a rug with a ruler, put a sheet of colored scrap paper, cut a 28 by 28 centimeter square. Cut diagonally in half.
- Examine the creasing folds shown in the photo, carefully outline them with a pencil.
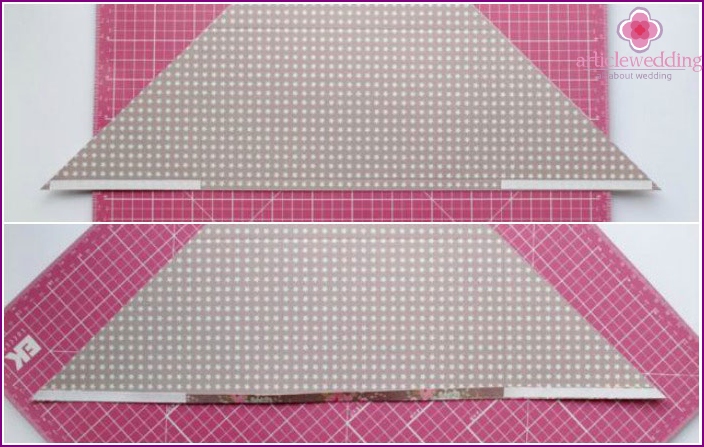
- Stick two thin strips of double-sided tape no more than 0.6 centimeters, as seen in the photo below.
- Fold the line at the base of the envelope. Glue double-sided tape on it. Along the way, do not forget to cut off the protruding edges that are already cut on the photo materials.
- Fold the sides of the envelope while fixing the base and top line. If everything is done correctly, you should get a perfectly flat envelope.
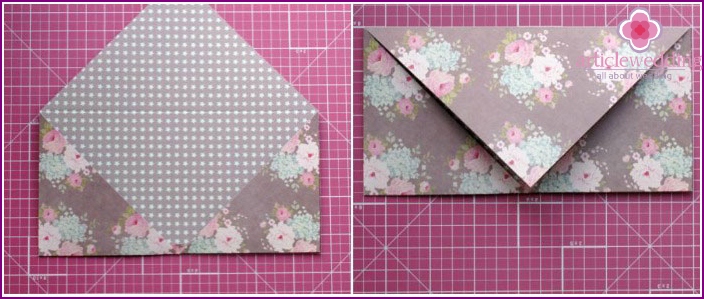
- On a double-sided tape, glue a 50 cm long satin ribbon around the envelope in front and back. From below there will be free edges of ribbons on which the card will be tied.
- Additionally, decorate the wedding envelope with tracery paper (use a hole punch to create it), hearts, beads, decorative flowers or other decorations.
- Make an insert no larger than 17.5 by 8 centimeters. Decorate it with prints or drawings. The original wedding envelope with a card is ready!
DIY Wedding Card Ideas
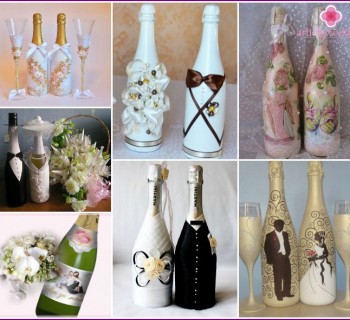
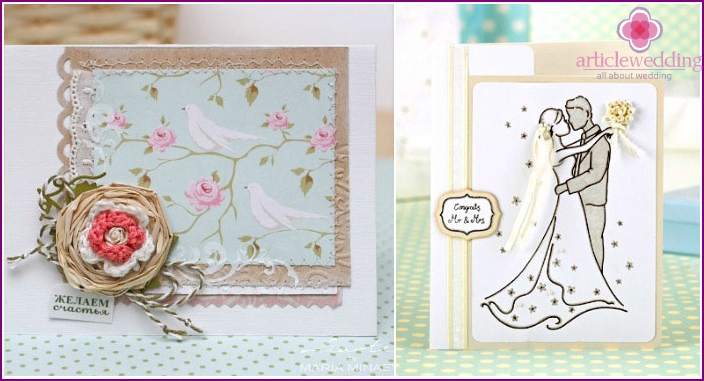
Making a wedding card on your own, you can safely experiment with the shape, size, color scheme. The main thing is that all the elements of the greeting card should look appropriate and harmoniously combined with each other. Rectangular, square, round cards, products in the form of a heart or two doves look good. See below for photos of some interesting wedding card design ideas..
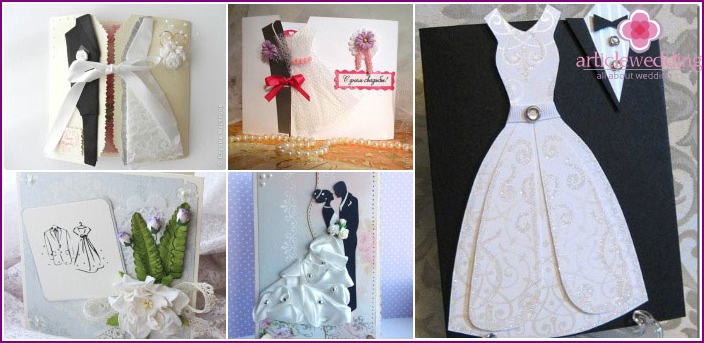
In the form of a dress of the bride and groom
Decorating a wedding greeting card with the dresses of the groom and the bride is a cool and unusual idea that will definitely please the newlyweds. For the manufacture of such a product, paper, satin, lace, chiffon fabrics, a variety of beads, decorative flowers, quilling rolls can be used. Two gold rings will look good.
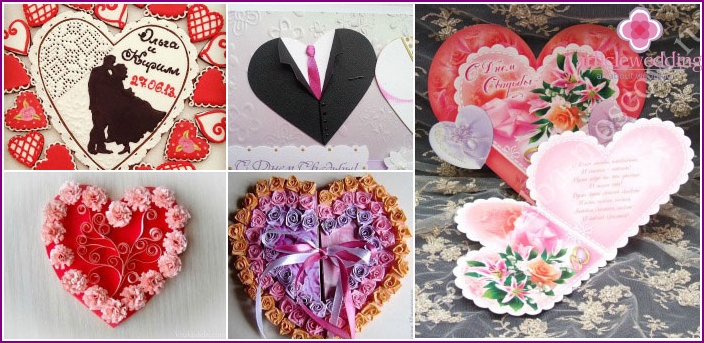
In the shape of a heart
The heart shape is perfect for making a wedding card. This is a symbol of sincere love between spouses. Greeting card can be created in the form of a heart, decorated with one or more of these elements. This version of the card will look good in red or any other color suitable for the theme of the celebration.
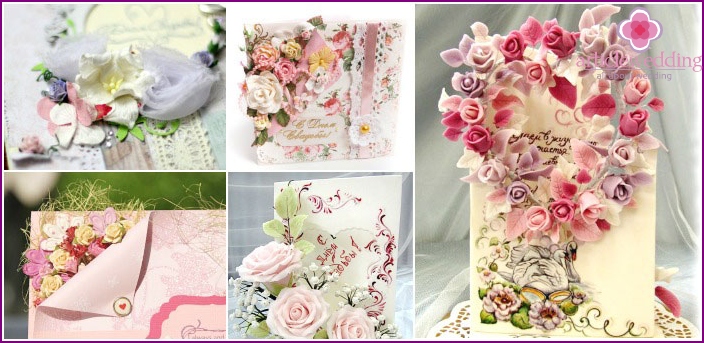
Bouquet of flowers
Delicate flowers are the perfect solution for decorating a wedding card. It can be a small bouquet, as in the master class above, or real «flower meadow». You can use natural dried flowers, artificial plants, paper elements, flowers made of polymer clay, fabric or plastic as decorative elements.
Video: wedding card workshop
Creating a wedding card for the bride and groom is a fascinating process that will give the giver a pleasure, and subsequently - pleasant emotions to the newlyweds. To make a truly beautiful greeting card and not to miss anything, watch the video master class below with detailed step-by-step instructions. Facilitators will help you create an elegant beige and snow-white postcard using thick paper for the base, elegant lace, satin hearts, a volumetric butterfly painted with golden paint, a ribbon and a small piece of paper with the inscription for decoration.