Contents
- Cardboard letters
- Necessary materials
- Stages of creation
- Photo
- 3D letters made of fabric
- Photo
- Styrofoam letters
- Photo
- 3D letters made of fabric
- Photo
- Styrofoam letters
- Photo
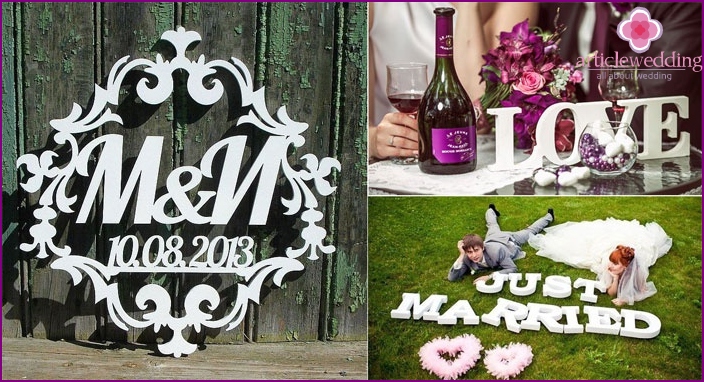
The newlyweds are doing their best to come up with original and bright ideas for their weddings. It has been especially popular lately to use a variety of exquisite details and decor items in wedding photography, in particular, to use volume letters. But how to make letters for a wedding photo shoot to bring a fashion trend into your celebration? Thanks to step-by-step instructions with a detailed description, you will learn how to make beautiful accessories for photo and video shooting. Add letters with bright unique details, add notes of personality to the final decor.
Cardboard letters
Cardboard letters are considered easy to manufacture. It is easy to make them, the main thing is to be careful in work, then the sides will come out smooth, the edges are the same. Cardboard accessories do not take up much space during transportation; they are easy to transport to the place of the photo shoot. It will not be difficult for the bride and groom to keep them and actively use them during the photo shoot. We suggest you make the letters with the initials of your names for the wedding or make up some kind of romantic word, inscription. Subsequently, they can become details of your home interior..
Necessary materials
- Corrugated cardboard (dispose of household packaging for this purpose).
- Scotch tape (you will need both double-sided and simple ordinary adhesive tape).
- Stationery knife.
- Scissors.
- Pencil.
- Ruler or tape measure.
- Professional marking board.
- Scrapbooking paper or beautiful colored paper.
- Any decoration elements that match the colors and themes of the celebration.
Stages of creation
- Use a professional marking board or a regular ruler to correctly indicate the dimensions of the workpieces. Having decided on the desired size, draw the figures with a simple pencil on cardboard. Then you need to cut the workpiece with a sharp clerical knife. We will need two details for each letter, so we need to make them in two copies at once.
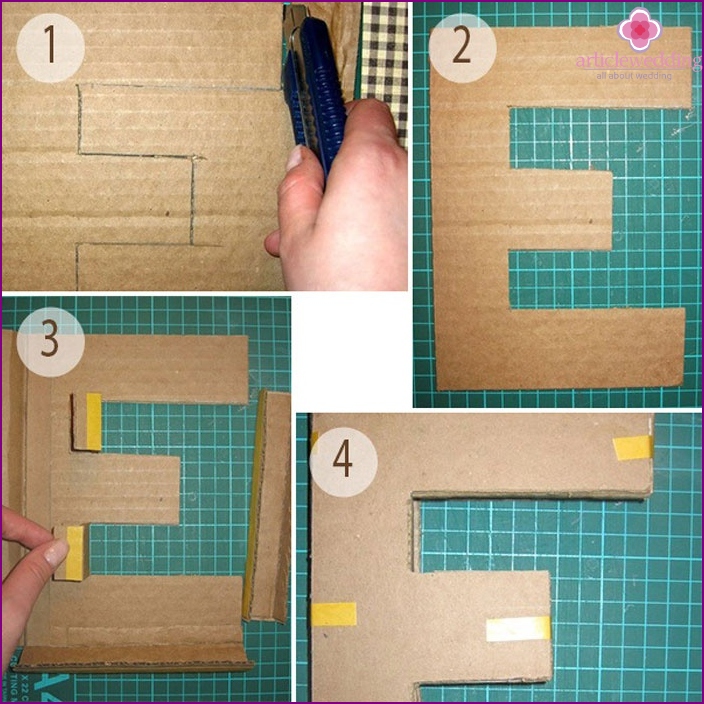
- Measure the length of each side of the workpiece around the perimeter. We cut the sides: the thickness can be any, we will make them 5 cm thick. To do this, we cut out cardboard strips of the required length 7 cm wide, leaving a centimeter of allowances for bending on each side. Bending the allowances with your hands, glue them to one side of the base with double-sided tape, forming the sides.
- We attach the second side of the letter to the sidewall and also glue it on the tape.
- We use ordinary adhesive tape to fasten the part in arbitrary places for reliability.
- We decorate the resulting workpiece according to our own taste and desire.
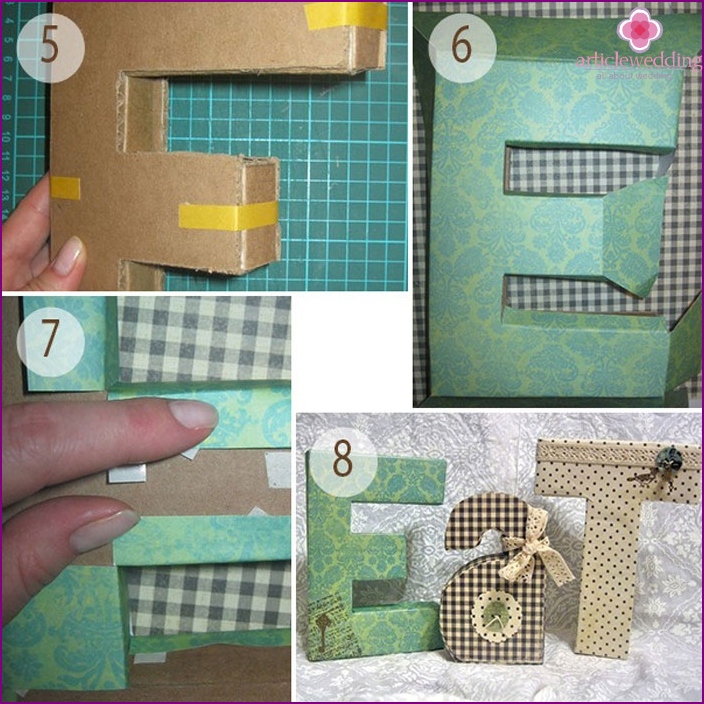
A simple and quick way to design a blank is to attach it to beautiful paper (you can use bright wallpapers for this), circle the shape with a pencil, adding a few centimeters on each side for bends. Cut the paper with scissors and glue PVA glue to the cardboard blank. Let the glue dry, then additionally decorate the facade with lace, beads, pearls, artificial flowers.
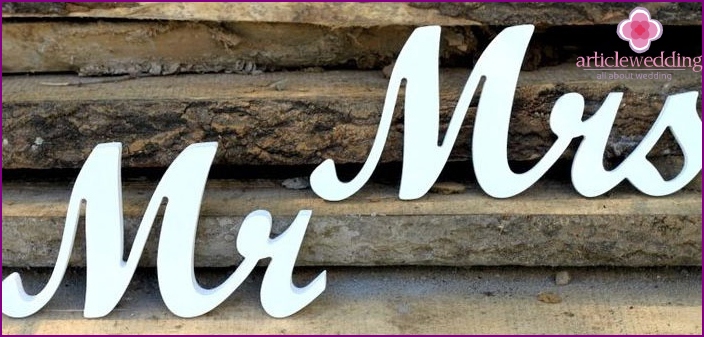
Common variants of words with volume letters for a wedding photo shoot: love, married, wedding, happiness, love, happy, just married, amore, amour. Phrases also look beautiful in pictures «I agree», «Forever», «Yes, I do», «A family». Exquisite inscriptions with signs of the equation look, for example, «Masha + Sasha = Love» or inscriptions «Husband» and «Wife» with arrows pointing towards the heroes of the photo shoot.
Photo
3D letters made of fabric
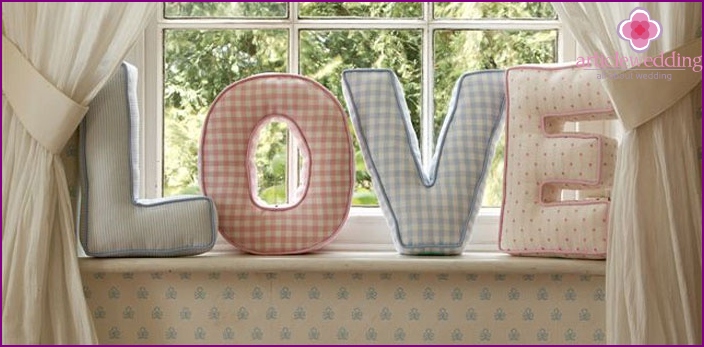
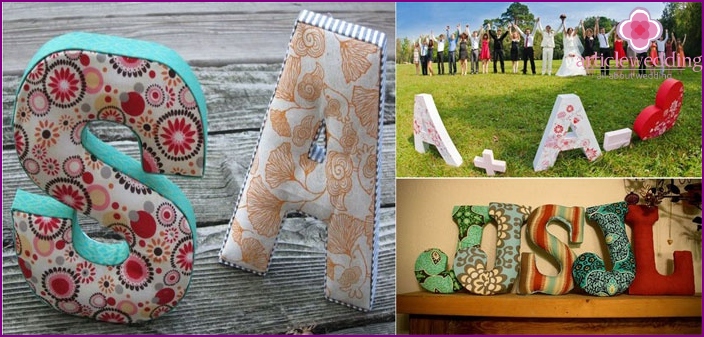
Soft letters look gentle and elegant for a wedding photo shoot. Such letters are nice to pick up, they look beautiful in photographs. Even those who for a long time did not hold a needle with a thread in their hands and have only basic knowledge in the sewing technique can make these accessories for a photo shoot. Show your imagination by choosing a bright fabric for your crafts, and then you will get beautiful accessories that will decorate the photo shoot at the wedding.
Necessary materials
- Soft not too thin fabric, it is advisable to use felt, fleece fabric or felt. Give preference to high-quality fabrics that do not peel off the edges..
- Sharp scissors.
- Durable threads to match fabric.
- Sewing needle.
- Volumetric material for filling letters: synthetic winterizer, synthetic winterizer or holofiber.
- Decorating elements: bright buttons, appliqués, ribbons, lace.
Stages of creation
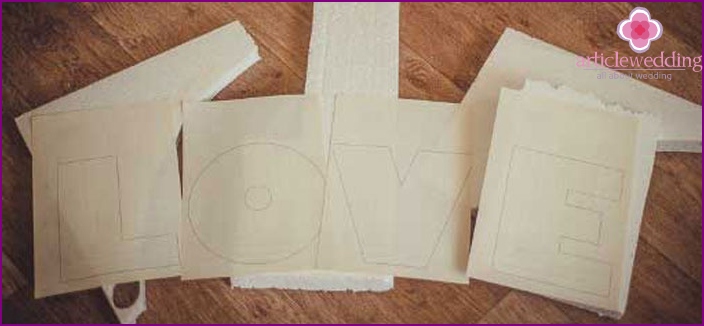
- At the beginning of the process, you need to make templates. To do this, it is recommended to write the necessary word or inscription in the Word document, setting the font you like. Visually determine the size by attaching a ruler to the monitor with the inscription. Print blanks with inscriptions.
- We apply patterns cut out of paper or cardboard to the fabric and trace the edges with chalk or a simple pencil. Next, cut out the patterns, making two blanks of each of them.
- We attach the patterns with the wrong side to each other and sew in an easy way - over the edge. For stitching, select a colorful thread to match or opposite the contrasting color, for example, a red thread to a white fabric.
- When stitching the edges, we fill the letter with a layer of filler, trying to make the thickness the same so that there are no bumps.
- Carefully stitch the entire perimeter of the craft. Decorate with decorating elements: sew buttons, fabric flowers, braid, lace.
Photo
Styrofoam letters
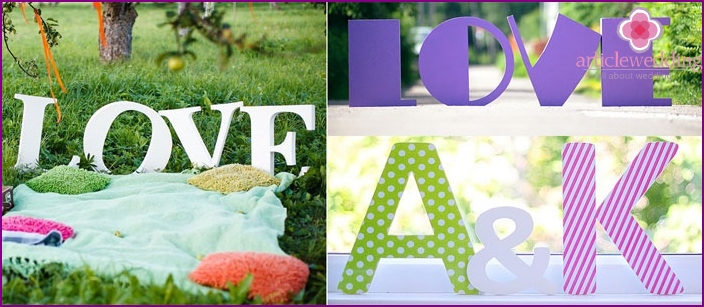
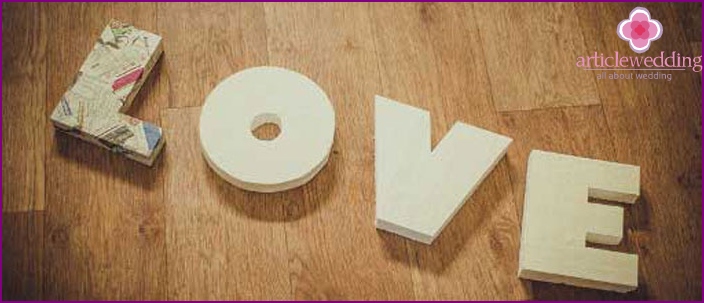
Foam letters with creative inscriptions are a popular accessory for a wedding photo shoot. Lightweight foam words look beautiful in pictures. You can toss them in the air, creating original and funny photo ideas. It’s easy to make large foam parts for filming, you just need to get the necessary material, imagination and free time.
Necessary materials
- Polyfoam (use polystyrene from packaging for household appliances or specifically purchase it at a hardware store, they sell it there in various thicknesses, so that you can choose the material you need for your idea).
- Bright marker.
- Office knife (sold at a hardware store in the wallpaper department).
- A piece of fine and large sandpaper.
- Various decorating materials: fabric, paper, paints.
Stages of creation
- On paper, you need to make a stencil with the font you like. We attach the cut letters to the foam and circle them around the perimeter with a marker.
- With a clerical knife, we cut out the outlines of letters.
- Using a large emery paper, we clean the surface of the parts, then finally grind the letters with fine emery, trying to make a smooth surface.
- We decorate the letters: we paint them with bright paint or glue them with colorful paper (some glue them with a vintage-style newspaper that needs to be cut into small strips), we sew them with cloth or glue them, and sprinkle glitter on top.
Foam letters decorated with garlands look beautiful and original. To do this, you can use both an LED strip of a suitable length, and the usual New Year's multi-colored garlands. Attach them along the perimeter of the letters in small strips of tape. Hang on a branch of a tree on the street with the help of wire and arrange a romantic evening photo session for the wedding. Unique, unique video and photo frames are guaranteed.
Foam letters can be made using polyurethane foam. To do this, make cardboard forms in the form of letters. Then fill these forms with polyurethane foam and leave to solidify. We take out the letters from the form, cut off the excess. The only disadvantage of this technology is that it will be followed by a long stage of polishing the surface with sandpaper. In addition, sometimes when filling out the form, voids may form that will have to be aligned due to
Photo
3D letters made of fabric
Soft letters look gentle and elegant for a wedding photo shoot. Such letters are nice to pick up, they look beautiful in photographs. Even those who for a long time did not hold a needle with a thread in their hands and have only basic knowledge in the sewing technique can make these accessories for a photo shoot. Show your imagination by choosing a bright fabric for your crafts, and then you will get beautiful accessories that will decorate the photo shoot at the wedding.
Necessary materials
- Soft not too thin fabric, it is advisable to use felt, fleece fabric or felt. Give preference to high-quality fabrics that do not peel off the edges..
- Sharp scissors.
- Durable threads to match fabric.
- Sewing needle.
- Volumetric material for filling letters: synthetic winterizer, synthetic winterizer or holofiber.
- Decorating elements: bright buttons, appliqués, ribbons, lace.
Stages of creation
- At the beginning of the process, you need to make templates. To do this, it is recommended to write the necessary word or inscription in the Word document, setting the font you like. Visually determine the size by attaching a ruler to the monitor with the inscription. Print blanks with inscriptions.
- We apply patterns cut out of paper or cardboard to the fabric and trace the edges with chalk or a simple pencil. Next, cut out the patterns, making two blanks of each of them.
- We attach the patterns with the wrong side to each other and sew in an easy way - over the edge. For stitching, select a colorful thread to match or opposite the contrasting color, for example, a red thread to a white fabric.
- When stitching the edges, we fill the letter with a layer of filler, trying to make the thickness the same so that there are no bumps.
- Carefully stitch the entire perimeter of the craft. Decorate with decorating elements: sew buttons, fabric flowers, braid, lace.
Photo
Styrofoam letters
Foam letters with creative inscriptions are a popular accessory for a wedding photo shoot. Lightweight foam words look beautiful in pictures. You can toss them in the air, creating original and funny photo ideas. It’s easy to make large foam parts for filming, you just need to get the necessary material, imagination and free time.
Necessary materials
- Polyfoam (use polystyrene from packaging for household appliances or specifically purchase it at a hardware store, they sell it there in various thicknesses, so that you can choose the material you need for your idea).
- Bright marker.
- Office knife (sold at a hardware store in the wallpaper department).
- A piece of fine and large sandpaper.
- Various decorating materials: fabric, paper, paints.
Stages of creation
- On paper, you need to make a stencil with the font you like. We attach the cut letters to the foam and circle them around the perimeter with a marker.
- With a clerical knife, we cut out the outlines of letters.
- Using a large emery paper, we clean the surface of the parts, then finally grind the letters with fine emery, trying to make a smooth surface.
- We decorate the letters: we paint them with bright paint or glue them with colorful paper (some glue them with a vintage-style newspaper that needs to be cut into small strips), we sew them with cloth or glue them, and sprinkle glitter on top.
Foam letters decorated with garlands look beautiful and original. To do this, you can use both an LED strip of a suitable length, and the usual New Year's multi-colored garlands. Attach them along the perimeter of the letters in small strips of tape. Hang on a branch of a tree on the street with the help of wire and arrange a romantic evening photo session for the wedding. Unique, unique video and photo frames are guaranteed.
Foam letters can be made using polyurethane foam. To do this, make cardboard forms in the form of letters. Then fill these forms with polyurethane foam and leave to solidify. We take out the letters from the form, cut off the excess. The only disadvantage of this technology is that it will be followed by a long stage of polishing the surface with sandpaper. In addition, sometimes when filling out the form, voids may form, which will have to be aligned due to putty.
Photo