Contents
- How to sew a lace wedding dress with your own hands?
- Greek style wedding dress
- DIY knitted wedding dress
- Video tutorial on sewing dresses for the bride
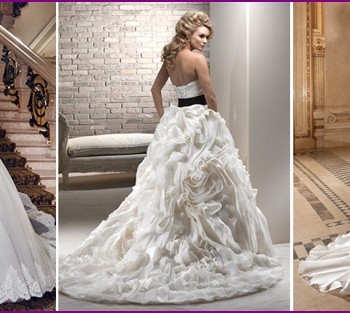
To create the image of the bride can not do without a charming wedding dress. In salons, shops, a huge assortment of models of different styles, shades, sewn from fabrics of different textures using a variety of decor elements is presented. But all (even the most expensive) dresses often have similarities with hundreds of other dresses, so the ideal option is to sew a wedding dress with your own hands. So you are guaranteed to receive an exclusive, chic decoration in which you will look and feel chic like a princess.
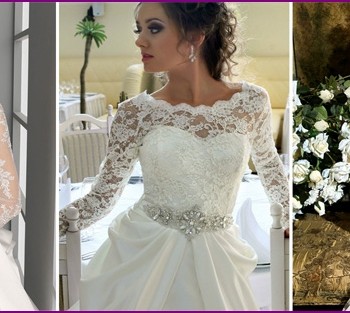
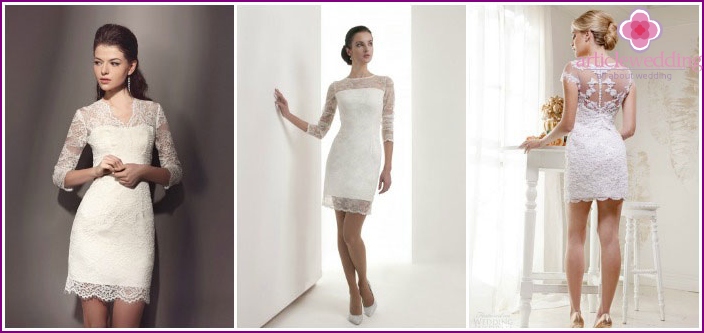
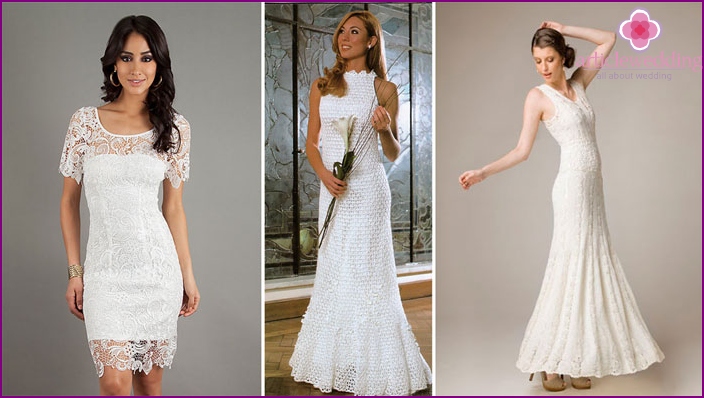
How to sew a lace wedding dress with your own hands?
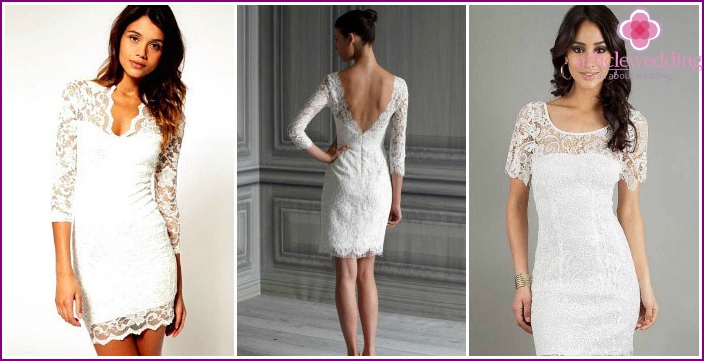
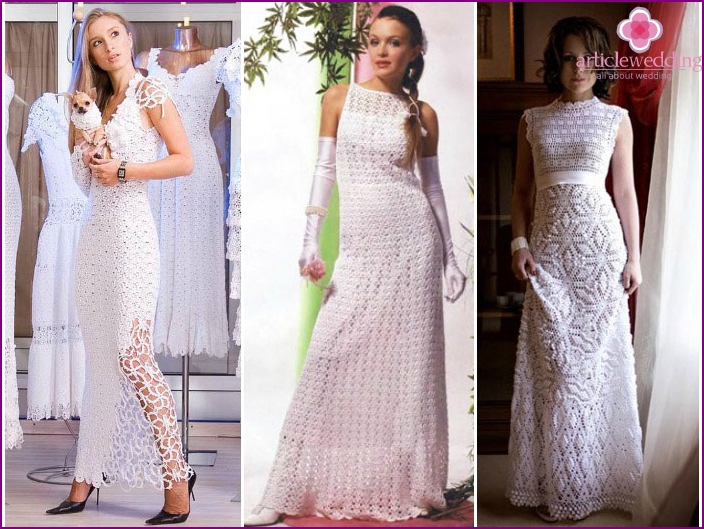
A charming, romantic wedding dress can be sewn using lace fabric. The style is perfect and will look good on slender girls with a sophisticated figure. An elegant dress will become a true decoration for the bride, and the idea that the decoration is completely her merit, the result of her work will warm the heart and delight even more.
Necessary materials
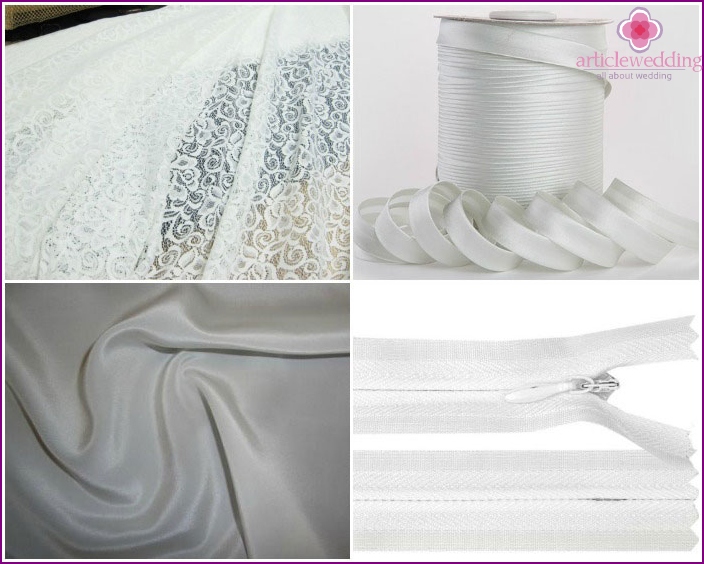
In order to sew a wedding dress with your own hands from lace, you will need:
- Lace fabric. The required amount of fabric is calculated based on the length of the finished product plus the length of the sleeve (if they are long). For maximum accuracy, you should draw a pattern, and in the fabric store attach it to the material - so you can accurately calculate the required footage.
- Lining fabric. The ideal option is poplin, it is a material pleasant to the body, which practically does not crease, keeps its shape. The color of the lining fabric should be chosen to match the lace.
- Secret lightning or decorative buttons.
- Slanting inlay for processing product seams.
- Decorative elements to decorate the finished wedding dress.
Pattern and stages of creation
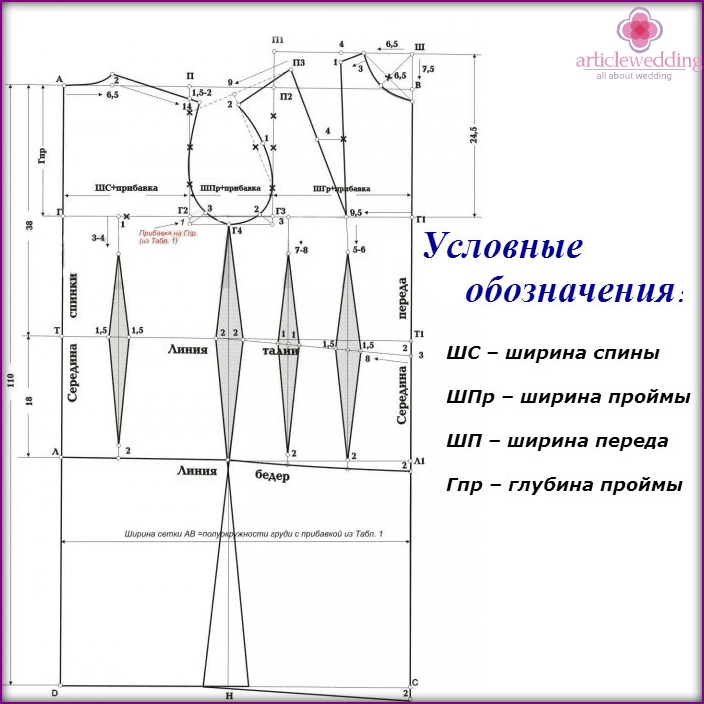
To sew a dress, you will need to create a pattern:
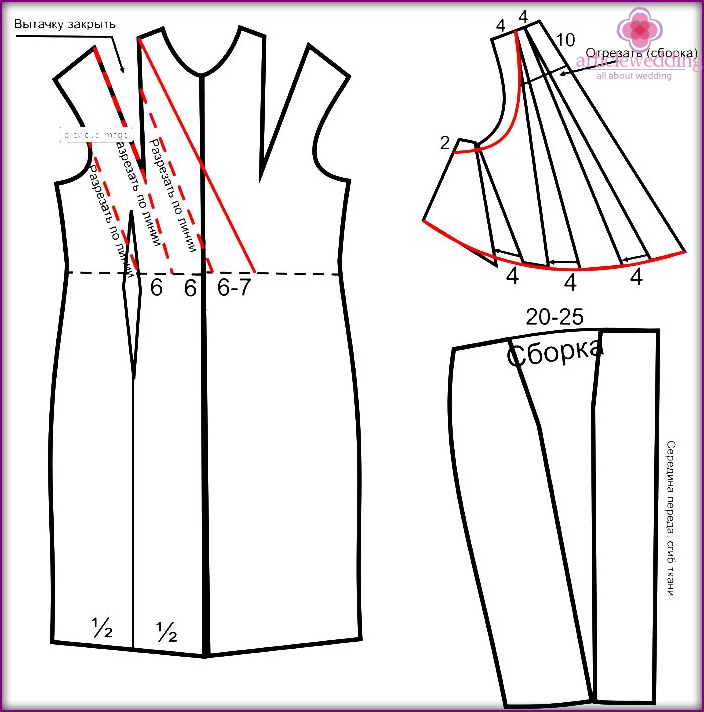
- First of all, it is necessary to take and record the necessary measurements: the volume of the chest, waist, hips, measure the estimated length of the finished product, sleeves. Based on the results obtained, build a standard dress pattern that will be taken as a basis, for an example, look at the photo.
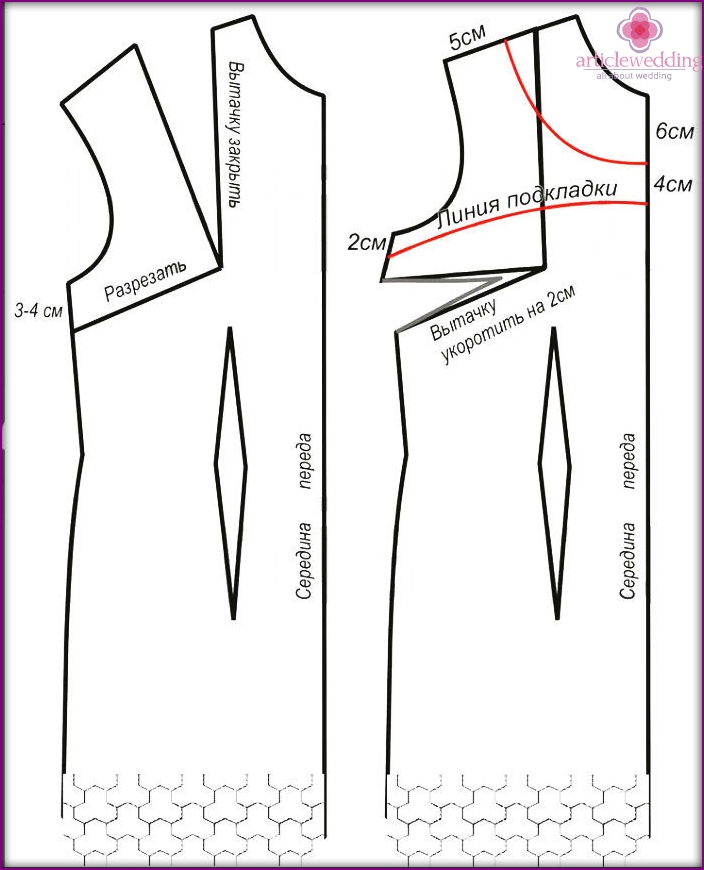
- To simulate the front of the dress, it is necessary to transfer the breast recess to the side, laying 3-4 centimeters down from the armhole, draw a line to the top of the recess and cut it. Cut the chest groove, glue, and shorten the side by 2 cm. The neck should be deepened by 6 cm, for this you need to measure 5 cm from the shoulder and draw a new line.
- So that the dress does not shine through, you need to take care of the lining. We cover in front of the lining: the pattern in front of our outfit is taken as the basis. From the armhole, lay down 2 cm, and from the new neckline 4 cm, connect the two points with a smooth line. Before lining is ready.
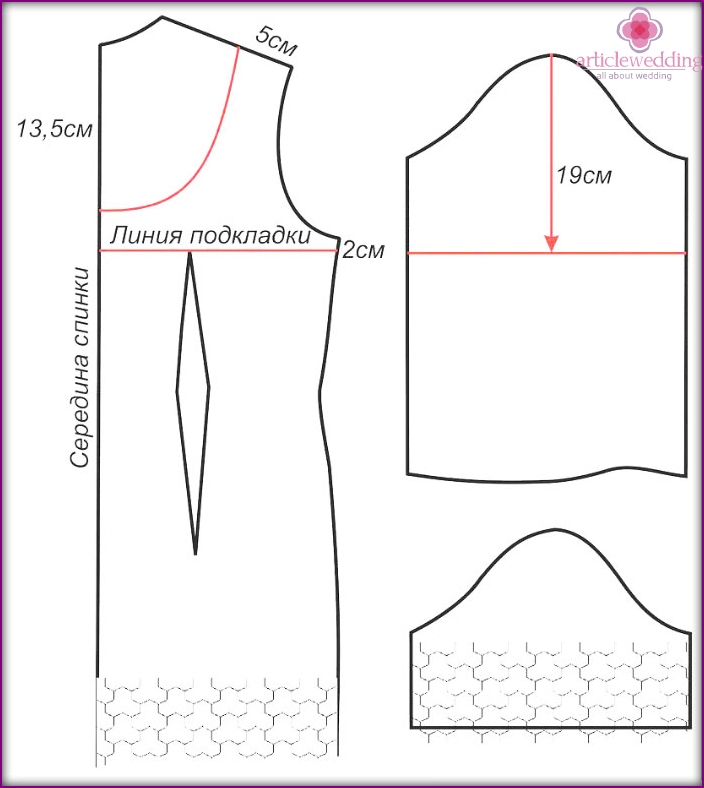
- To build the back, it is necessary to deepen the neckline on the main pattern: 5 cm to retreat from the shoulder, and 13.5 cm from the neck; connect two points.
- We model the lining for the back: according to the finished pattern of the back of the dress from the armhole, postpone 2 cm, draw a horizontal line.
- To build a narrow sleeve, a single-seam element pattern is used, the only thing is that it must be shortened to the desired length, removing excess from the rollback side.
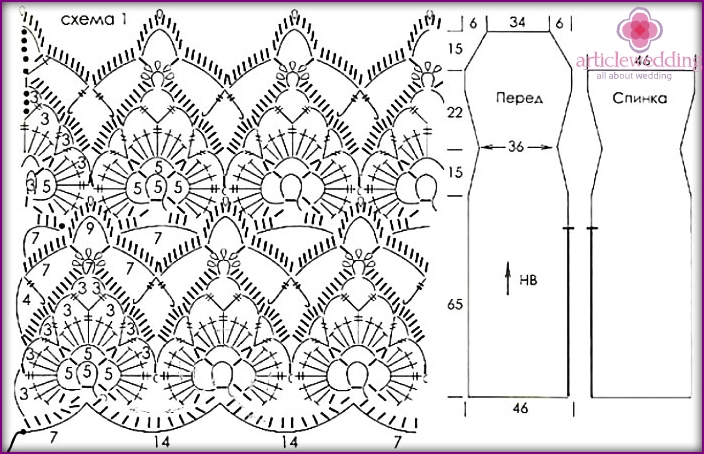
Having built a pattern, cut it out of paper, draw it on the fabric and begin to cut, and then sweep the product:
- As a result of the cut, it should turn out: from lace fabric - two details of the sleeves and the back, one detail of the front with a fold; from the lining - 2 elements of the back, 1 front.
- During the cut, do not forget about allowances for seams - for processing the neck, sleeves, seam seams of 1.5 cm, leave 3 cm from the bottom of the lining.
- Process the top and bottom of the lining fabric, connect the front of the dress with the lining, sewing it in place, as indicated on the pattern. By analogy, connect the backrest to the lining material..
- Sweep, stitch all undercuts, side and shoulder seams. Sew a hidden zipper on the back of the dress.
- Sew sleeves and connect them to the dress.
- The neck of the dress must be treated with a slanting inlay to the tone of the main material.
Amazing masterpiece for the wedding is ready. In this outfit you will look just stunning!
Greek style wedding dress
The bride looks original and tender in clothes sewn in the Greek style. The indisputable advantage of this outfit is the ability to hide all the flaws of the figure, focusing on the merits - an open neckline emphasizes a beautiful chest, light flowing fabrics make the silhouette slimmer, which is especially true for full girls. Sewing a Greek dress is easy, it will take a little time and effort, but the result will exceed all expectations.

Necessary materials
To sew a wedding dress in the Greek style you will need:
- Main material. A light flowing fabric such as chiffon, silk, satin, jersey is ideal for such an apparel; atlas and tulle are less commonly used. The color of the material can be snow-white or different shades of beige - ivory, ivory. The model requires a large amount of fabric to make it luxuriant with many beautiful, light folds, due to which lightness and airiness of the image are created.
- Dense fabric cut for belt formation.
- Decorative elements, details for decorating the outfit.
Pattern and stages of creation
There are models in the Greek style that do not require patterns, but consider the original version of sewing, which is ideal for a wedding dress.
- As a basis, we take a standard pattern built in accordance with individual sizes.
- To build the front, you need to cut the pattern along the waistline. Apply modeling lines to the upper part and cut them and push them apart, as shown in the photo. The lower part must be cut in the groove and push apart.
- The back also cut. Narrow the lower part and cut the upper part as shown in the pattern..
- Additionally, it is worth carving straps and a belt. The width of these elements is 8 cm, and the length is individually adjustable.

Cut the fabric according to the finished patterns. In order to assemble the dress, it is necessary to connect the bottom of the outfit with side seams, making assembly (folds) on the front part, then sew on the bodice, back, fastening the parts with an overlap. Connect the front and back with straps. For decor, sew a beautiful belt decorated with beads, beads, sequins or fabric with an interesting texture. Straps can also be decorated with beautiful elements. Chic wedding attire is ready.

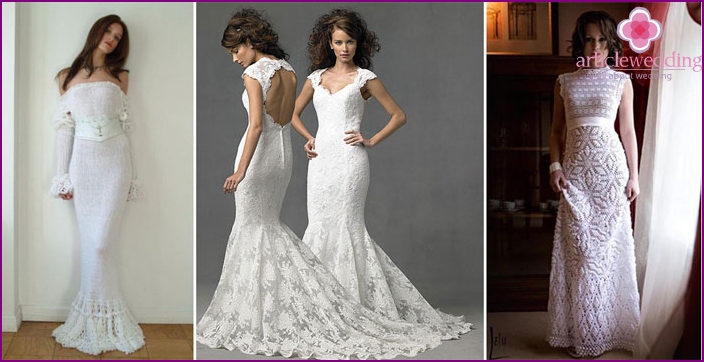
DIY knitted wedding dress
Bride needlewomen who know how to crochet or knitting needles will be able to knit an exclusive dress, the equivalent of which will not be in any wedding catalog or store. This option of creating a robe for a wedding will require considerable effort and time, but the masterpiece that results will be worth all the effort: the outfit will be appreciated by the beloved and all the guests present at the wedding ceremony.
Necessary materials
To knit a wedding dress you will need:
- Yarn. Great option - thin cotton threads, for example, «Iris», but woolen ones are hardly suitable for this.
- Hook or knitting needles. Particular attention should be paid to the size of knitting tools, which depends on the chosen yarn..
- Sewing accessories: needle for stitching parts, pin.
- Decoration accessories.
- Lining fabric (if the dress comes out too transparent or stretched).
Schemes and stages of creation
In order to knit an amazing wedding dress, you must perform the following steps:
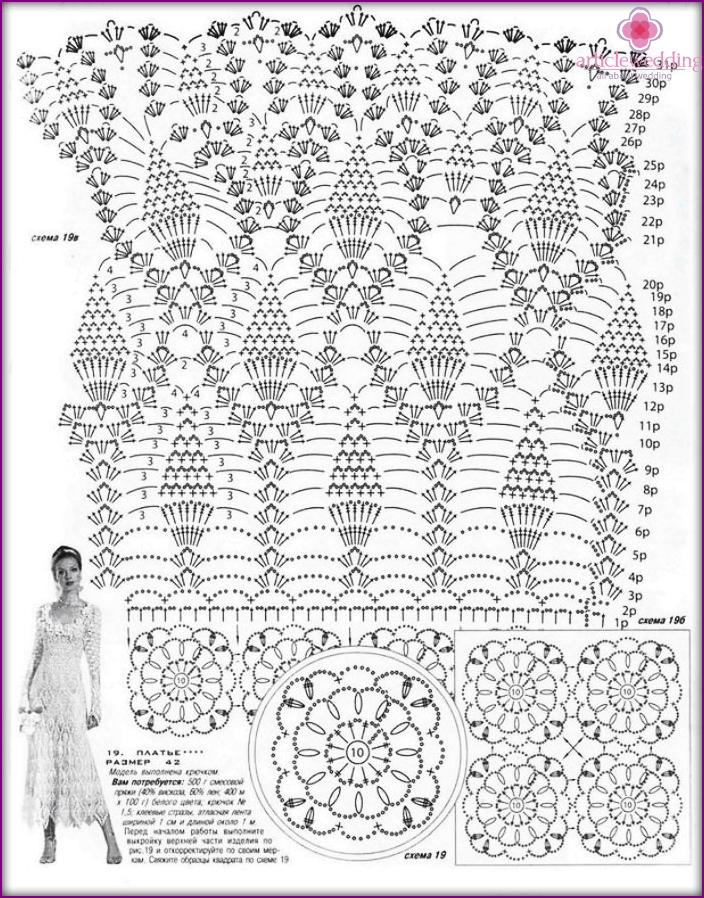
- Prepare a pattern of real sizes. This is to make it easier to check where you need to reduce or add loops. If there is no experience in building patterns, do not worry, any old dress or sundress will do, which needs to be cut into details and focus on them.
- Choose the scheme according to which the outfit will be knitted. A wide selection provides the opportunity to find the motive that you like the most. In order to determine the density of knitting, it is necessary to tie a sample (square 10 x 10 cm).
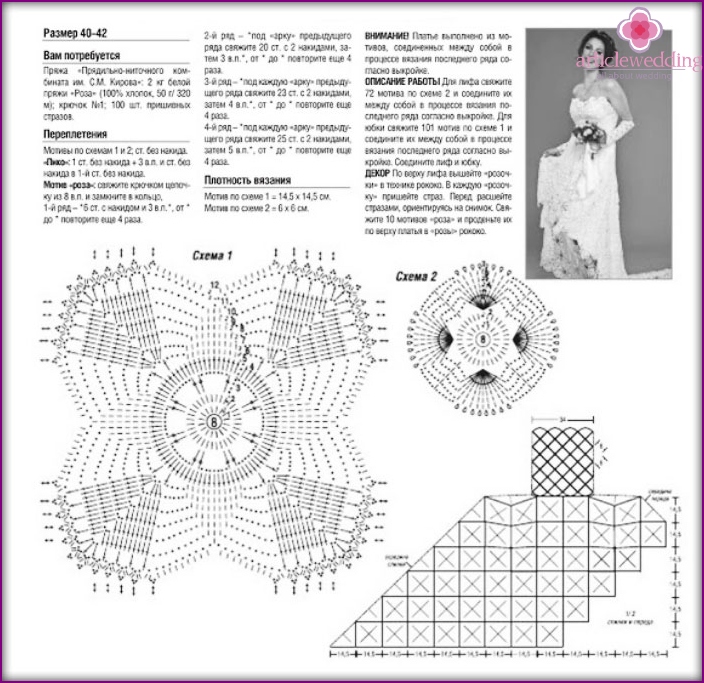
- Start knitting the back of the product, from time to time applying the product to the pattern, checking the dimensions. By analogy, tie before.
- Tie off the straps, it is advisable to make those that will be regulated. If the dress is closed, it is necessary to tie the sleeves.
- Join the parts by stitching the side and shoulder seams.
- Process the neck with a brisk step, and the edges of the product with openwork viscous.
- In most cases, the knitted product is too transparent, so you should take care of the lining..
- Decorate the finished product with beads, beads, other decorative elements.
Video tutorial on sewing dresses for the bride
Few girls boast excellent sewing skills and knowledge of the secrets of this matter. But the desire to sew, create an unusual wedding dress with your own hands, which certainly was not and will not be in any other bride, overshadows all fears, makes you study. In order to deal with some of the features of tailoring a wedding attire, watch the video, where the master tells in detail about the intricacies and features of tailoring such decoration: